To update if your image is lower than 9.9.4 you must update using a binary image. Contact Tech Support for location and credentials to download updated image.

There are two are options – restore the binary image using the 10ZiG Manager (https://www.10zig.com/product/solutions/10zig-manager) or use a thumb drive created by TzImgUtil (See Question 3 under 10ZiG Manager to download the USB Image Utility).

Update using 10ZiG Manager

    1. Install the 10ZiG Manager and copy the binary file to 10ZiG Manager\ImageStore (created when you install the 10ZiG Manager)
    2. If the thin client is seen in the 10ZiG Manager, right click on it, select Image Management and then Backup and Restore

The thin client will be moved to the Image recovery tab with PXE set to Yes

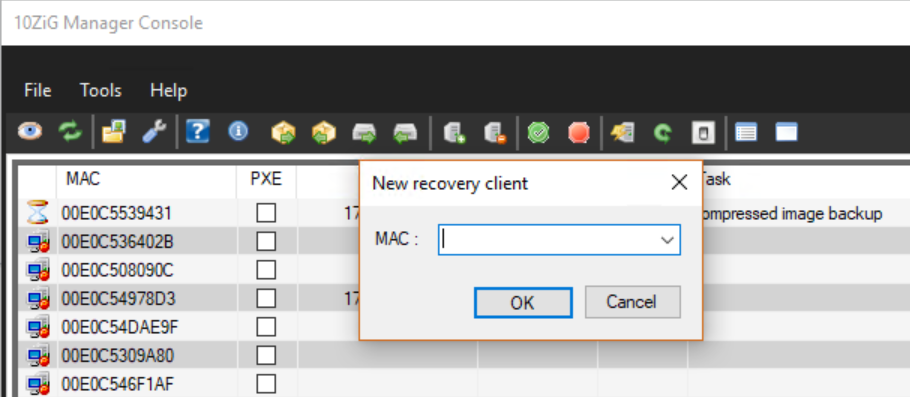
If the thin client is not seen by the 10ZiG Manager, click on the Image recover tab and add the MAC address of the thin client using the Add MAC ICON

  • Change the BIOS settings of the thin client to boot from LAN (BIOS password is 10ZIG)
  • Boot the thin client and it will PXE boot to the 10ZiG Manager
  • When the thin client has booted it will be displaying a recovery menu on the display but do not use that menu, rather use the Image recovery tab. Right click on the thin client to be reimaged (it should now indicate PXE YES with a green dot) and select Restore Binary Image>
  • Select the image file to be restored
  • The 10ZiG Manager will restore the image and indicate a successful restore when complete
  • Right click on the thin client and deselect the PXE boot option
  • Reboot the thin client which now has the updated image

Update using a USB Thumb Drive

  1. Download the image utility from our FAQ pages (See Question 3 under 10ZiG Manager to download the USB Image Utility and documentation).
  2. Extract the utility and run the program to make a USB thumb drive bootable for the utility
  3. Make certain you format as fat32 and the USB thumb drive needs to be large enough to hold the boot files and the binary fileNote: This program will erase all files on the thumb drive
  4. Enter the BIOS of the thin client (password 10ZIG) and set the first boot to USB (on some units the option may be USB Zip)
  5. Boot the thin client using the created USB thumb drive
  6. Use the menu on the display to restore the image
  7. Once complete reboot with thumb drive removed to an updated image

Become a 10ZiG Ready Partner

Apply to become a 10ZiG Ready Partner HERE and let’s start creating great stories together.

Get Your 30-Day
Free Demo

Experience the power of 10ZiG risk-free. No credit card. No obligation.